Owner of Mountainfeet, an independent provider of mountain leading services in the United Kingdom. Experienced mountaineer, skier, paraglider and mountain biker. Previously ran a specialist independent outdoor shop for eighteen years using the same name.
Backpacking in the UK has probably never been so popular and given Mountainfeet used to sell tents when we were based in Oldham, our interest in the latest product is still high.
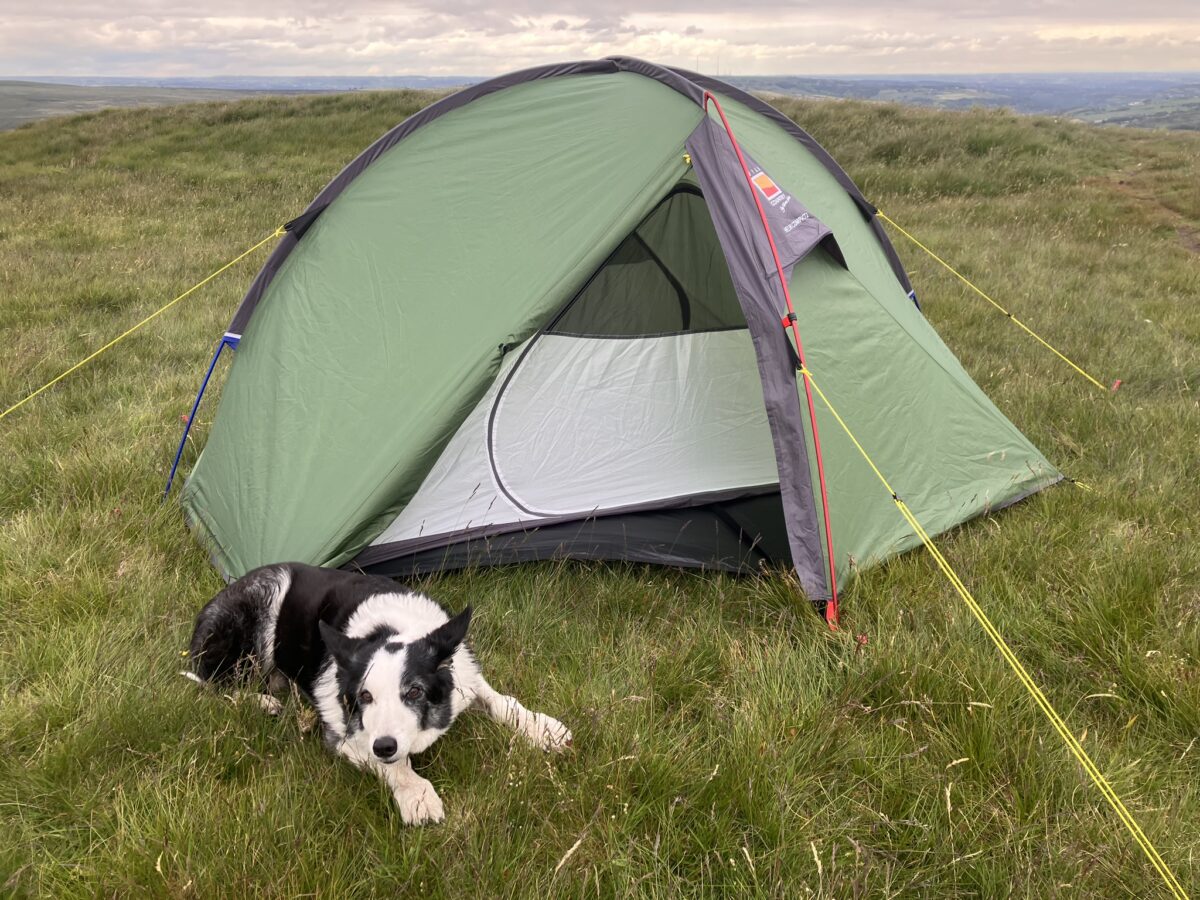
Lately, Si, Lizzie and Gyp have been testing a few of the most popular back packing tents on the market. One of the best value for money two person tents has to be Wild Country’s Helm Compact 2 which is very much designed for the UK’s unique weather!
Si took time to pitch one in breezy conditions on Pule Hill and Lizzie stoically filmed his efforts. Hopefully, the result might be of interest to any of our Mountainfeeters who are already into or getting into backpacking…
Not everyone remembers to take spare boot laces out with them and if one snaps it can be a pain to repair. Why not use one or a pair of laces as lanyards for your compass or other pieces of indispensable kit you always take with you?
Lengths for laces are roughly as follows:
120cm for a walking shoe.
150cm for a lowish cut rambling style or small size mountain boots.
180cm for very large sizes or full on mountain boots.
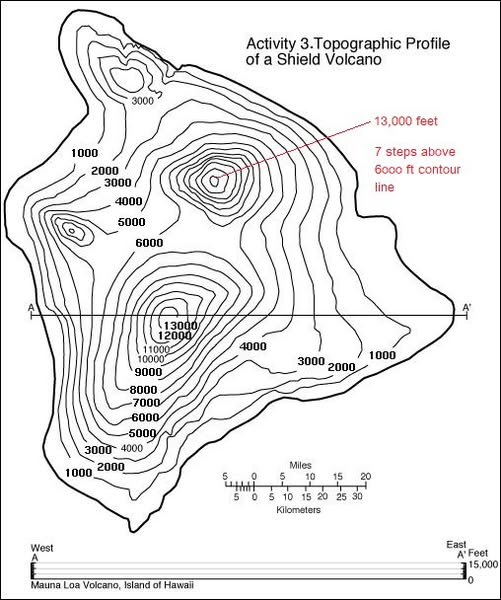
There seem to be many of you out there who are embracing again the art of navigating using map and compass techniques. We find that one of the hardest skills to master is the visualisation of the terrain around us using just contour information from the map.
One trick that Si uses is to obtain (or pinch off the kids!) some Plasticine or equivalent to make a simple 3D model of a contour map. Here, he’s used a contour only representation of the Mauna Loa volcano on Hawaii and set himself 15 mins to sculpt a rough approximation of the topography.
If you have OS Maps, and a PC, you could zoom in on a chosen area of interest and try the same exercise. Then, in the 3D mapping mode, you can see how accurate your model is!
Top tips, start simple – maybe just a single prominence first. Then work up to more complex terrain featuring cols, spurs and re-entrants. Set a time limit but use the first couple of minutes for just looking at and understanding the 2D map first. Don’t overthink things – just a basic representation will do. Make sure you have a means to check what the contours actually look like in real life – as already mentioned, OS Maps has a 3D feature.
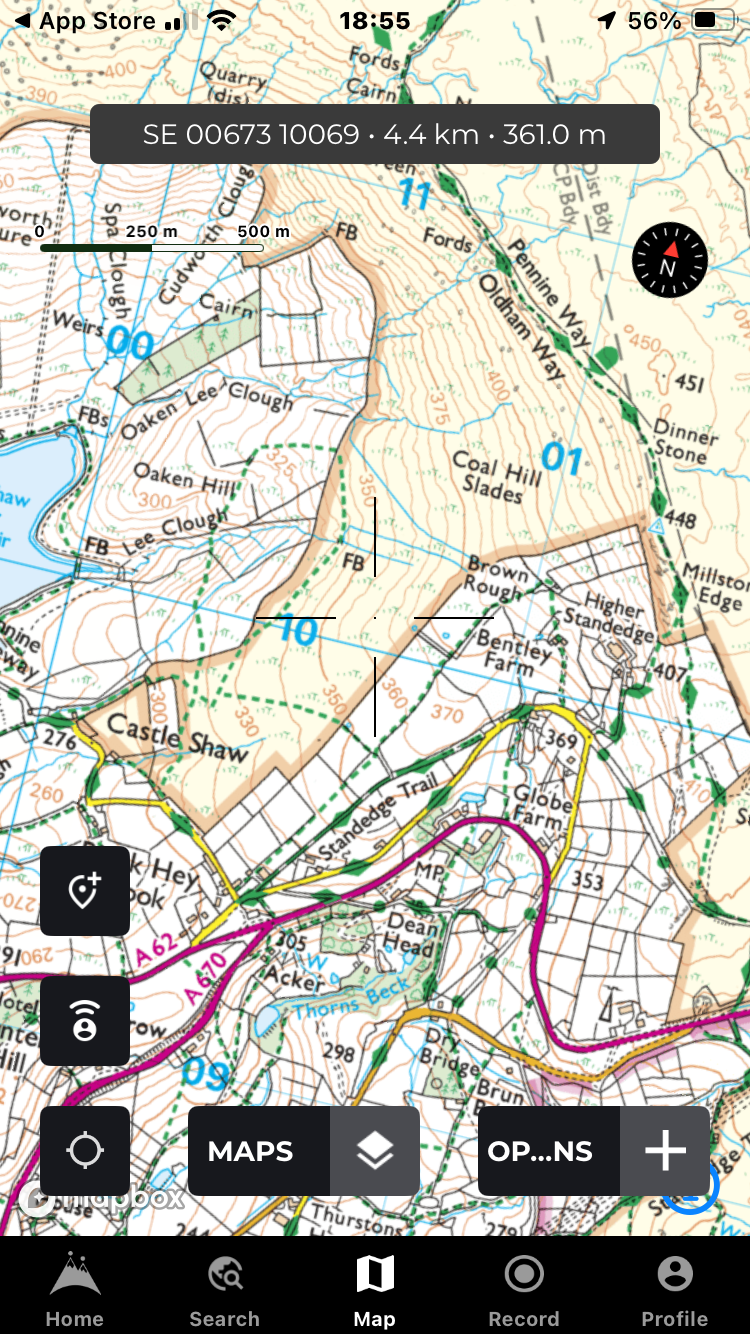
We’ve used digital mapping for many years now – in fact we started selling it at Mountainfeet in CD format back in 2002. There are now several companies marketing UK specific mapping software and apps, most of whom are licensed to offer the UK’s top quality Ordnance Survey topographic maps in 1:50,000 and 1:25,000 scales. This article offers information on a few that we use regularly and have faith in on the hill.
Naturally, we’d still recommend carrying a paper map and compass plus having the knowledge to use it if venturing into serious terrain. However, GPS devices, smart phones and digital mapping are here to stay and we should embrace the technology and learn to use it expertly…
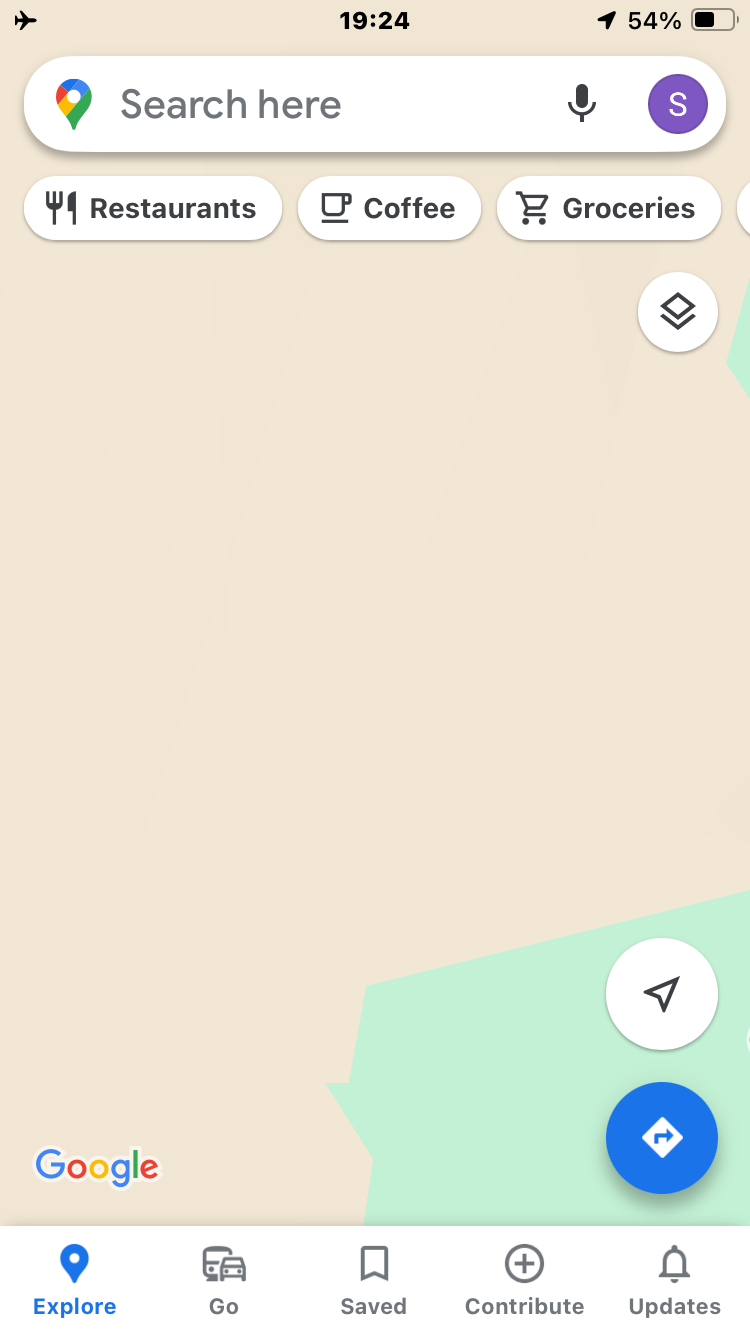
How Googlemaps sees the Old Man of Coniston!!!
Before we get into detail however, we’d like to stress the importance of having any smart phone app mapping that you may rely on DOWNLOADED to your phone so it’ll still load and work WITHOUT SIGNAL. Frighteningly, many casual walkers are still assuming that online non topographical mapping apps like Googlemaps will safeguard them in the hills!
Most mapping apps these days allow you to save portions of mapping direct to your phone’s memory (not the Cloud) – the trick is to download them in advance while you’ve got a 4G signal or WiFi. We’re still coming across folk on the hill whose mapping has disappeared just when they’ve needed it most!
Finally, it shouldn’t really need stating that phone batteries should be fully charged before setting off, a power pack with lead carried and the phone protected inside a waterproof pouch or case in wet weather.
In our opinion, two excellent apps* with an affordable yearly subscription to OS’s 1:25,000 and 1:50,000 scale maps are OS Maps and Memory Map. We find OS Maps opened on a PC or Mac browser is also the best solution to print your own map sections out – we use waterproof paper. If like Si, you struggle to read small print, then they also offer the chance to print at a large scale – 1:12,500, which makes features and names really stand out.
OS Maps shares many of the social platform features found in other apps that can be used to find routes already planned by others and also share your own favourites. Nowadays, this is an accepted method to find walks and other activities when in an area unknown to the user. Usefully, there’s a toggle switch (among other filters) that selects ‘recommended routes’ only. This provides some defence against choosing an unverified route that may show on the map but not on the ground and is worth switching on!
Like most other modern apps, when plotting your own route on screen, a ‘snap to’ feature is provided which will automatically lock onto the paths used. This can sometimes be a bit flaky and so ‘snap to’ can be turned off if needed or if going completely off piste.
OS Maps can’t cope with multiple way points or routes so is of less interest to a technical user. But it’s simple to use, robust in the field and good value.
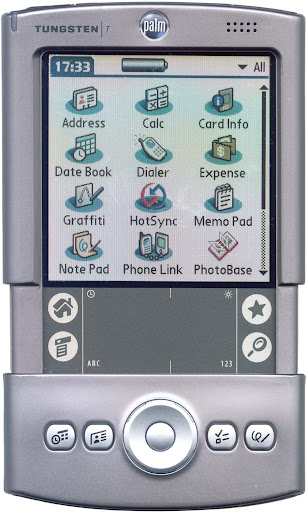
Memory Map software has been a thing since the early millennium – we started selling it on CD for use on PC’s for planning purposes. Our first ‘portable’ usage was when Si used it on an early Palm Tungsten T2 (remember them?) device on a Mountainfeet off piste ski course in the Alps. Since then, the software has evolved for use in the current generation smart phone apps but has stayed true to its upper end technical roots. This might alienate it from the younger mass market but make it a better choice for a ‘power’ user. It’s a little harder to get your head around than the less technically featured apps but if you’re prepared to learn then it’ll repay in spades on the waypoint and route plotting front. Memory Map have also employed some clever trickery to sharpen bitmap mapping such as OS and IGN which allows clearer zooming for those with eyesight issues.
Memory Map offer a huge database of map types – in addition to topographical land maps of the UK, Europe, North America, New Zealand and Australia, there are also UK marine charts available too.
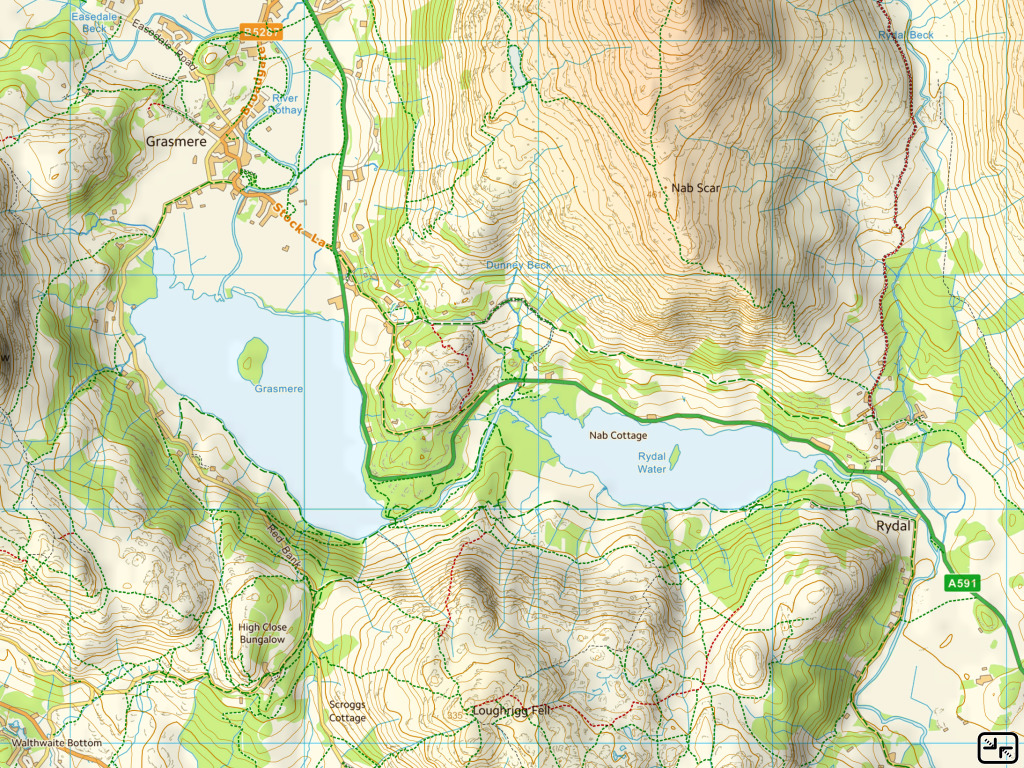
Example of free mapping – click to enlarge.
Another app we use regularly is the lesser known UK Map which has a once only cost of £9.99. Since 2010, Ordnance Survey have released a large amount of their map data under a free “OpenData” licence. These free maps cover the whole of the UK and can be downloaded and read via the UK Map app. Very usefully, the app also has superimposed footpaths derived from Open Street Map data although these won’t necessarily be legal rights of way. It’s much more of a serious navigators tool than OS Maps and more complicated to use, but once mastered it’s very useful for those on a small budget. However, there’s no mapping offered for outside of the UK and should you want to upgrade to pukka OS maps, you’ll have to purchase them – there’s no subscription option. The issue here is that you won’t get updates to your mapping as with the other products featured here. You may think there’d be little change in the rural landscape that needs re-plotting but think about woodland and forested areas that can change drastically in even five years! There’s no social platform or opportunity to share your routes with the masses – this is a bare bones but effective tool of the trade authored by a technical enthusiast. Route planning in app takes a bit of mastering – like several other features it’s not intuitive and the file handling system still has us beat! But for importing pre created GPX files it works brilliantly and many times it’s our go to app…
If you’re somewhere other than the UK, then your best bet is likely to be the Outdoor Active app which covers a surprisingly large area of the world with maps of various detail. This app has enjoyed huge investment to allow its development and is used all over the world. UK users may remember it in a previous incarnation as ViewRanger which was revered by many and used by outdoor professionals and mountain rescue teams. Some of the technical functionality seems to have been dumbed down in favour of attracting a younger and more socially orientated user base. There’s no denying that it provides a valuable and instant resource when visiting new places but customers should take care to validate route information submitted.
The Buddy Beacon feature that existed on ViewRanger has thankfully been rolled out in Outdoor Active too. Provided you have a paid subscription you can share your whereabouts with others – a valuable safety aid provided you’ve got phone signal.
Outdoor Active has three levels of subscription and can be used in a very basic format for free. But to unlock national topographic mapping and the full Pro+ feature set you would need to pay £54! However, for most users the £27 Pro package would be perfectly adequate and affordable…
HiiKER mapping screen.
*As a relatively recent postscript, a new kid on the block has arrived called HiiKER which offers mapping for both the UK and abroad. This app is authored by an Irish company and has real promise to deliver a product reminiscent of the much missed ViewRanger package which was superseded by Outdoor Active. The HiiKER team seem receptive to feedback and are very proactive with regard to improvements, upgrades and constant evolvement of their product. While embracing the now necessary social platform and route sharing options, the software is capable of more complex actions for advanced users. After speaking to one of HiiKER’s developers, it would appear that they share the professionals viewpoint that there’s a niche for a more ‘pure navigation’ orientated app to compliment the myriad of others that seem primarily to just deliver set and shared routes…
HiKER is subscription based and there are various offers currently popping up via social media offering first year deals. A really useful safety feature is the ability to share your track and location with others – we’ve tested this recently and it works well. OK, if you lose signal then tracking will cease while there’s no coverage, but should a drama occur then emergency services or your nearest and dearest will have your last known fix. This is a valuable starting point for any searchers and could save the day.
Hopefully, you’ll now have an idea of both the value of digital mapping apps and which particular one might suit you best. If you’re a mountain professional or tech aficionado then you might like to subscribe to a couple or more before making your mind up. In practise, we find ourselves switching between two or three packages depending on our needs. Don’t underestimate the value of the basic mapping that many apps provide as these can often detail paths derived from Open Street Map or similar data sources that aren’t mapped onto Ordnance Survey maps. We will often flick between the two during the course of a day or while planning an activity.
Below are links to the five apps mentioned above. Go enjoy…
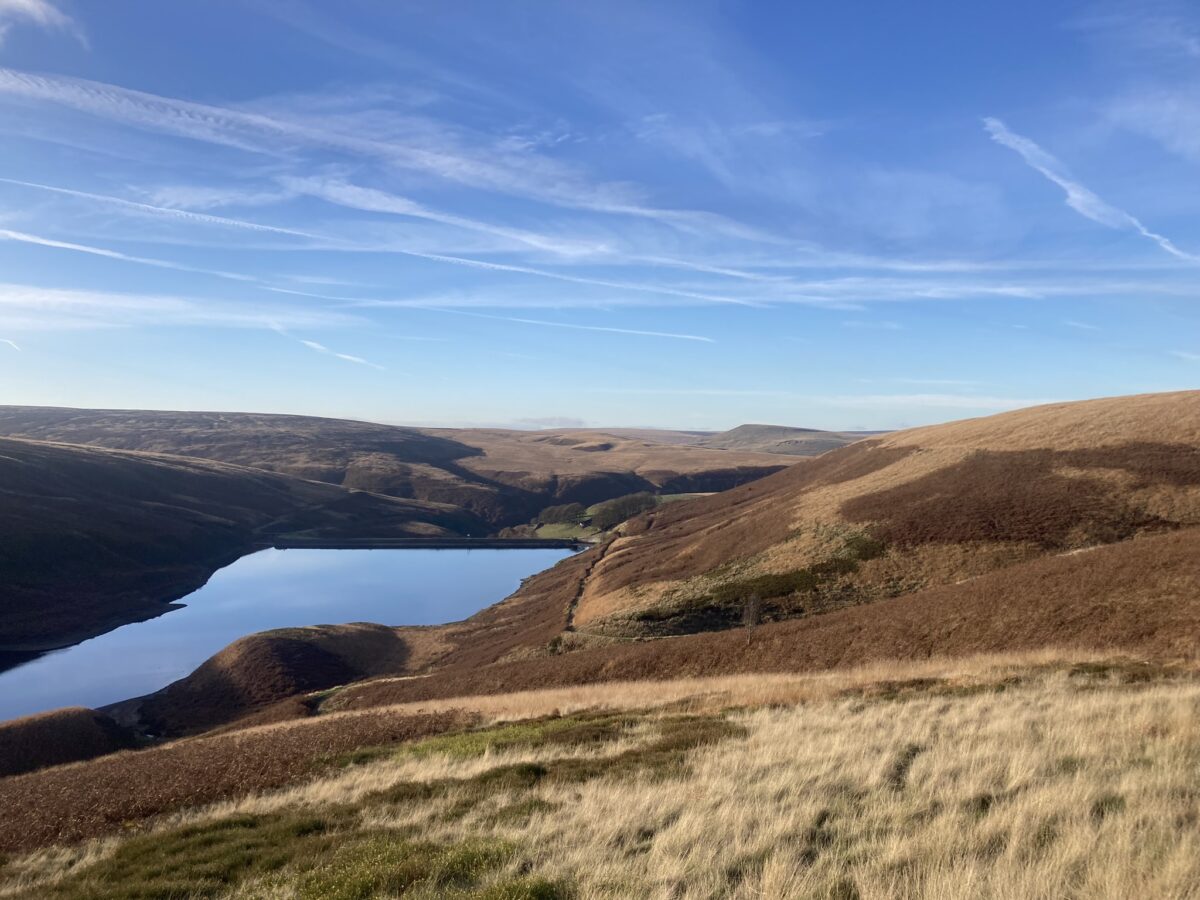
The lovely village of Marsden in West Yorkshire is where Mountainfeet are based and has immediate access to classic Pennine hills and moorland. The area is a popular escape for those living in the Greater Manchester and Leeds conurbations. There are many varied walks in the area, from easy low level rambles to strenuous and remote high moorland routes that need more careful preparation and some outdoor expertise.
The area enjoys quite a biodiversity with much plant, bird and animal life to be seen depending on where you are and the time of year. Particular to the local moorland are birds such as curlew, short eared owls, red grouse and the rare twite. Mammals include the elusive mountain hare, deer and of course our famous Marsden sheep!
Here for starters is a favourite route we’d recommend using Marsden as a start and finish point. There are ample facilities for both before and after your activities in the village, including parking, pubs and cafes…
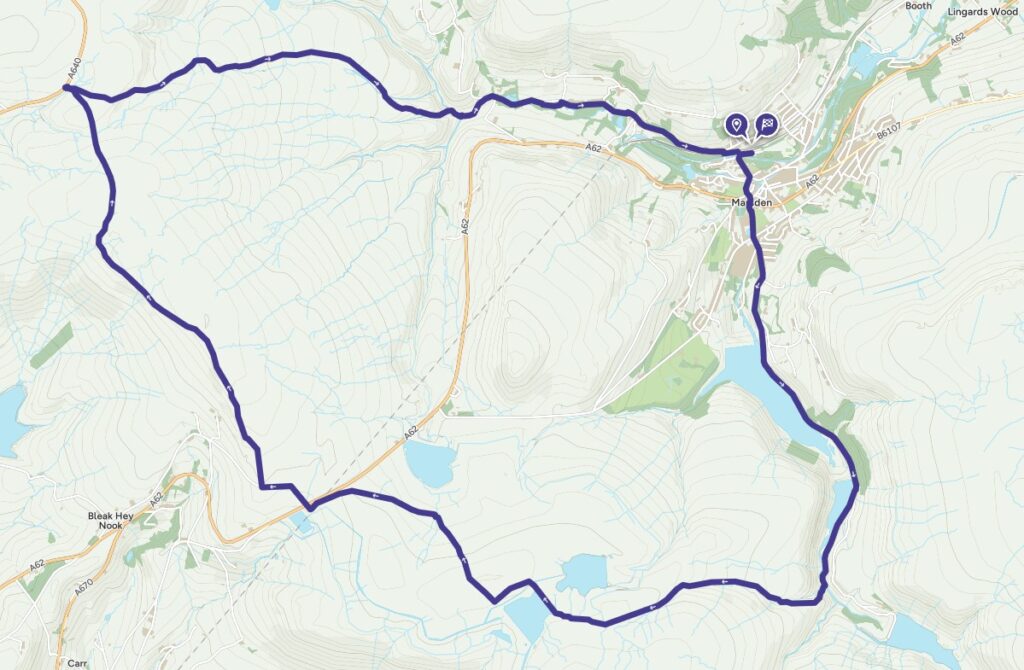
Standedge Circuit
This ten mile circular route contains a mix of many different types of terrain, starting at around 600 feet in Marsden and making a total ascent of nearly 1,500 feet before a gentle finish down the towpath of the famous Huddersfield Narrow Canal. You’ll experience a high level section of the Pennine Way and lots of rugged upland terrain along with areas of historic and industrial heritage such as the chain of impressive reservoirs in the Wessenden Valley.
Allow up to five hours to enjoy this route and take food, drink and hill walking kit to be self sufficient and safe.
You can download* a GPX route file for use with your devices mapping software.
*Mountain, hill and moorland walking can be dangerous and you must take personal responsibility for your own safety. You should always carry a backup means of navigation and not rely on a single phone, app or map. Mountainfeet aims to provide accurate routing information and descriptions but cannot accept responsibility for changes, errors or omissions.
A while ago, Si posted a short article on our Facebook page suggesting what was prudent to carry for a winter months walk in the hills or mountains. Here it is as reference for website readers and potential clients:
Just because we’re getting into the winter months doesn’t mean we should have to cut down on our mountain adventures! But we do need to adopt different attitudes to planning, what we attempt and the gear we carry and wear. Today, Si will share what he carries in his rucksack for a day out in the mountains…
“In my experience, there’s a balance to be found between carrying too little and too much on a mountain walk. Too little seems to be the norm these days and we see folk suffer when an unforeseen situation presents itself. However, I also occasionally see a mountain enthusiast carrying a pack so big and overweight that it jeopardises their chances of covering distance over difficult terrain.
This article is just a rough guide but is the result of years in the mountains and lots of fine tuning. I’m mindful of the fact that many folk will be on tight budgets but I still can’t stress enough the importance of buying quality and preferably lightweight kit.
Around our locality, access to the hills tends to be easy – from car park to first climb may only be a few hundred metres or so. Probably for that reason, we’re seeing many day walkers carrying very little in the way of ‘what if this happens?’ type gear. This means that in the event of an issue, particularly one where they’re rendered immobile, self rescue is often impossible and help from others becomes necessary. Some of the kit I carry may not only assist me in an emergency but equally could make a big difference to someone else I come across.
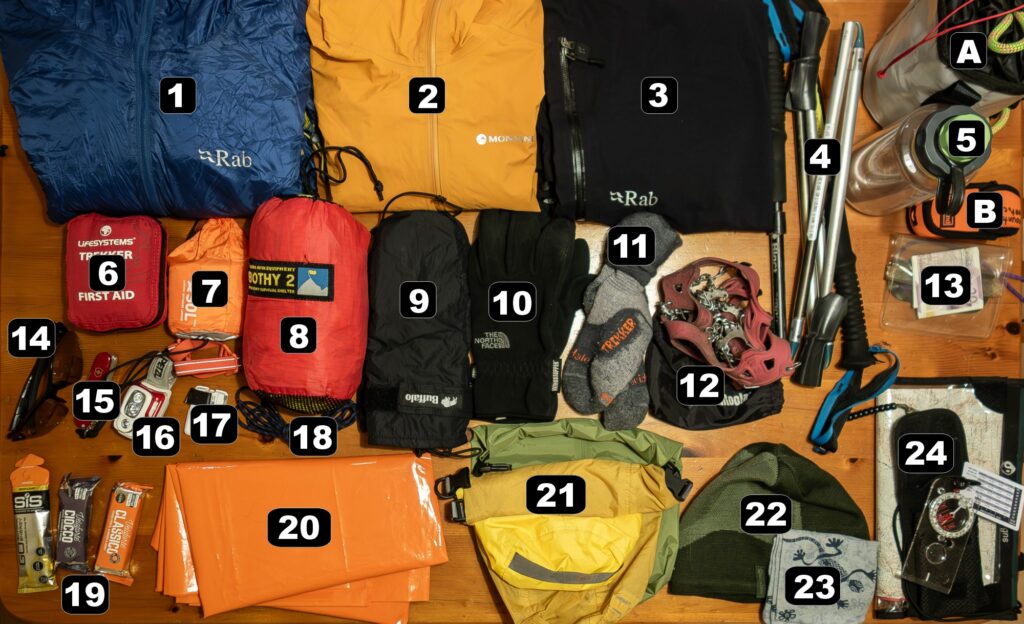
Some might feel that the pack contents illustrated are more than are needed for their activities and I respect the choice of the individual. There are a few items in the image that are ‘optional extras’ and would only be carried on certain routes that might involve scrambling, wintry weather or more remote terrain. All I’m attempting to do is to present a ‘toolkit’ for the mountains that can cover most eventualities.
OK, let’s look at it all in detail…
1) An insulative mid or outer layer for when not moving. Best to be a synthetic fill as unlike down jackets, they still perform when wet. This means that in an extreme situation, you can throw it over other already soaked clothing and it will still retain warmth.
2) The all important waterproof and preferably breathable jacket. Even if you think it won’t rain, it should still be packed as it’s also windproof and will retain body heat in an emergency.
3) Waterproof and preferably breathable overtrousers. These should be capable of being donned without taking your footwear off – three quarter or full length zips are the easiest to put on.
4) Walking poles. These can be a controversial item to advise on and are an individual preference. No longer seen as just for ‘old people’, most mountain professionals not only use them but recommend them for their clients. I’m an occasional user of them so have as light a set as possible that fold shorter than my pack height. If you carry a longer set on the outside of your rucsac then ensure the tips are protected and don’t project upwards into other walker’s faces!
I also wrap a few turns of Gorilla tape (or duck tape) around the top of the poles for repairs – this is an old ski touring trick!
5) Water container or carrying system. The Nalgene bottle in the system is my preferred way of carrying water in freezing conditions as it stows in the pack (outside of the waterproof liner) and stays warm. However, I’m a big fan of soft reservoir systems such as Camelbak and Source in warmer weather when two plus litres of water may need to be carried and accessed quickly. In heat, it’s also a good idea to add some flavoured electrolyte tablets to help replace body salts – my favourites are Nuun tablets as they taste good!
Also worth carrying is a water filter ‘soft’ bottle such as the Salomon XA Flask. I often use this to cut down on weight of fluid carried as you can fill it from streams and drink straight away.
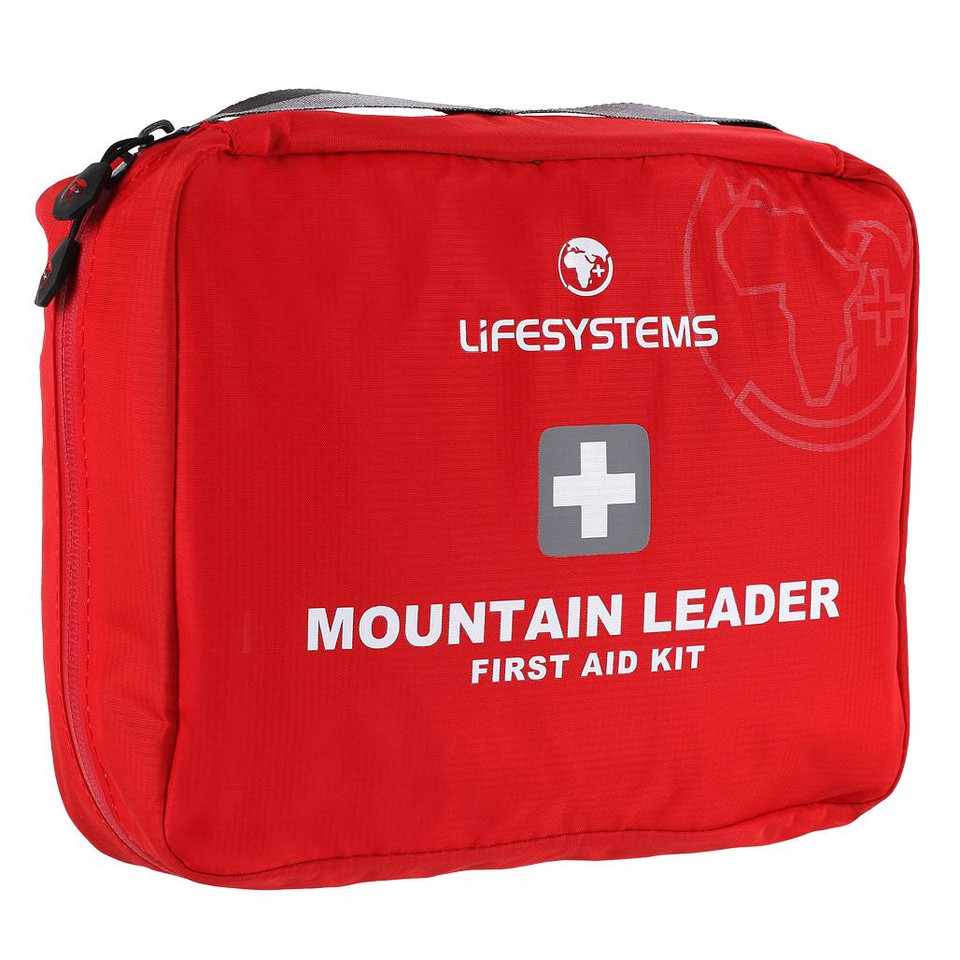
6) A first aid kit of some description should always be carried – if not for yourself then for those you may come across. Keep it basic as improvisations can be made with clothing when it comes to slings and bandages. It’s worth carrying blister and insect bite treatments together with a couple of puritabs to sterilise stream water should you run out of what you’re carrying. Make sure the kit has plasters & dressings, sterile cleansing wipes, toughcut scissors, eyewash and nitrile gloves. I also carry paracetamol for my various aches and pains – personal medications should be carried but not administered to others. Most good lightweight mountain first aid kits such as those made by Lifesystems also have basic primary care advice leaflets to guide you through a trauma.
7, 8 and 20) These are all variations on the theme of a survival bag and I sometimes carry all three! I’d recommend at the very least a light weight and minutely packable foil emergency bivvy bag (7) such as is made by Lifesystems or Sol is carried – it could save your or another’s life. Don’t be tempted to buy a foil blanket – they’re next to useless! The larger storm shelter is useful for waiting out foul weather, particularly if you’re with others – they’re available in two person right up to eight or ten person versions! Mine is a two person type big enough for myself and Gyp to chill out in.
The classic orange heavy gauge polythene bivvy bag (20) is better than the foil bag if you have room and is reuseable. I like to carry one to spread out and sit on for resting and eating if with other folk. In foul conditions or an emergency you can literally just climb in and feel the heat start to build around you.
9 and 10) Good gloves are vital in winter. A simple fleece or power stretch glove is easy to put on when it gets cold and can be wrung out when wet and still insulate. I prefer a windproof version as per item (9). Steer clear of gloves with a loose liner – they can be impossible to put on when your hand’s wet! You need something that will work in wet conditions – Buffalo mitts are good and easy to put on. They seem expensive for what they are but have saved my hands from frostbite a couple of times. For full on winter work I carry heavier duty gloves and mitts.
11) Another optional extra is a spare pair of socks – useful for changing into if your boots leak.
12) Micro spikes. Generally only carried during winter time and in icy conditions but also very useful on wet grass, slippy stone, stream crossings and muddy paths. I think these are a game changing piece of kit – most people only feel they need them after having a winter nightmare by which time they’ve often sold out. There are many varieties including the cheap and cheerful Yaktrax which weigh very little. For me however, there’s no other choice than Kahtoola Microspikes – the fact they’re issued to most Mountain Rescue team members speaks volumes and I carry them year round.
13) Phone in waterproof case. Most folk have a mobile phone these days and despite some traditionalists decrying them you’d be bonkers not to carry it! But there’s no point having it unless it’s fully charged and you know how it can best help you on the hill. Finding a signal in the hills used to be almost impossible but coverage is getting better all the time now – EE seems to work best in the mountainous areas. You can sign up to the 999 text service which will transmit an emergency message over a weak signal where no voice can be carried. The phone can often be tracked by Mountain Rescue teams in order to locate you if lost or in distress.
In addition to the phone, a separate power bank to recharge it is strongly advised. Alpkit do a little beauty called a Juice Boost which gives 5,000mAh and has USB micro and USB C leads built in. Amazon sell USB C to Lightning adaptors to ensure you’ve got all bases covered or you can plug a Lightning or Garmin watch lead into to the Juice Boost’s separate USB slot. The power bank will also come in useful if your head torch battery runs low.
There are many mobile phone apps out there to assist with navigation and to summon help – I’d recommend at least a basic subscription to OS Maps for planning and navigation plus the free OS Locate to pinpoint your position to relay to emergency services. There’s also an app called UK Maps which is far better featured than OS Maps albeit it takes time to get your head around! But this has many features for more accurate navigation and after the initial small purchase price, the excellent OS VectorMap based mapping is free to use.
Always make sure you download the necessary mapping for the area your route takes so it’s available ‘offline’ and will still display when out of signal. Relying on Googlemaps or similar basic online only phone mapping has got many folk into trouble. Of course, you could invest in a dedicated GPS with on board mapping, such as those produced by Garmin.
14) Some form of eye protection for sun, rain, hail and snow. I use Bloc Titan photochromic sport glasses which work well in virtually all light levels. Don’t forget some reading glasses too if you’re an old gimmer like me!
15) A small penknife such as a Victorinox Spartan.
16) Headtorch. This is a vital piece of kit on short winter days in case of finishing your route in the dark or being be-nighted. Don’t rely on your phone torch – it’s not bright enough and could run the battery down just when you need the phone for emergency purposes.
17) Spare batteries for headtorch.
18) Spare boot laces – 150cm or longer to fit all footwear. Also useful for making repairs to kit.
19) Food. Make sure you carry enough calories to see you through the day and beyond if there’s a problem. The bars and gels in the photo would usually be supplemented by some ‘real’ food such as sandwiches. On really cold days it’s also good to carry a small flask containing a warm drink or soup.
20) Heavy gauge polythene bivvy bag as previously mentioned.
21) An assortment of dry bags to keep pack contents waterproof. Not shown is a large rucsac liner bag (literage should be bigger than pack) that protects all the kit apart from the water bottle and poles from wet weather. Ortleib make an excellent range of such roll top bags but for those on a budget there are plenty of alternatives online or you could use strong bin liners.
22) Beanie hat for cold weather.
23) Neckgaiter for pulling up over face in serious conditions. Buff are a market leader in these garments.
24) The all important map and compass. Often the last resort for many when navigating but not reliant on batteries, signal or delicate technology. Mine generally stays in my pack as I navigate using GPS technology but every so often I practise with the map and compass. No point carrying the items if you don’t know how to use them!
A. 8mm x 20 metre ‘confidence’ rope. Only carried if on terrain where a fall would have serious consequences. If taken, stow it in a small deployment bag rather than loose in coils that are likely to tangle if needed in a hurry. Learn the basic techniques for protecting yourself and others – simplicity is key and you shouldn’t need additional slings and carabiners in a walking/basic scrambling environment.
B. If you’re operating in a really remote area where there are known phone signal issues, you might want to invest in a personal locator beacon (PLB) that will summon help through a satellite link. The model illustrated is a McMurdo Fast Find 220.
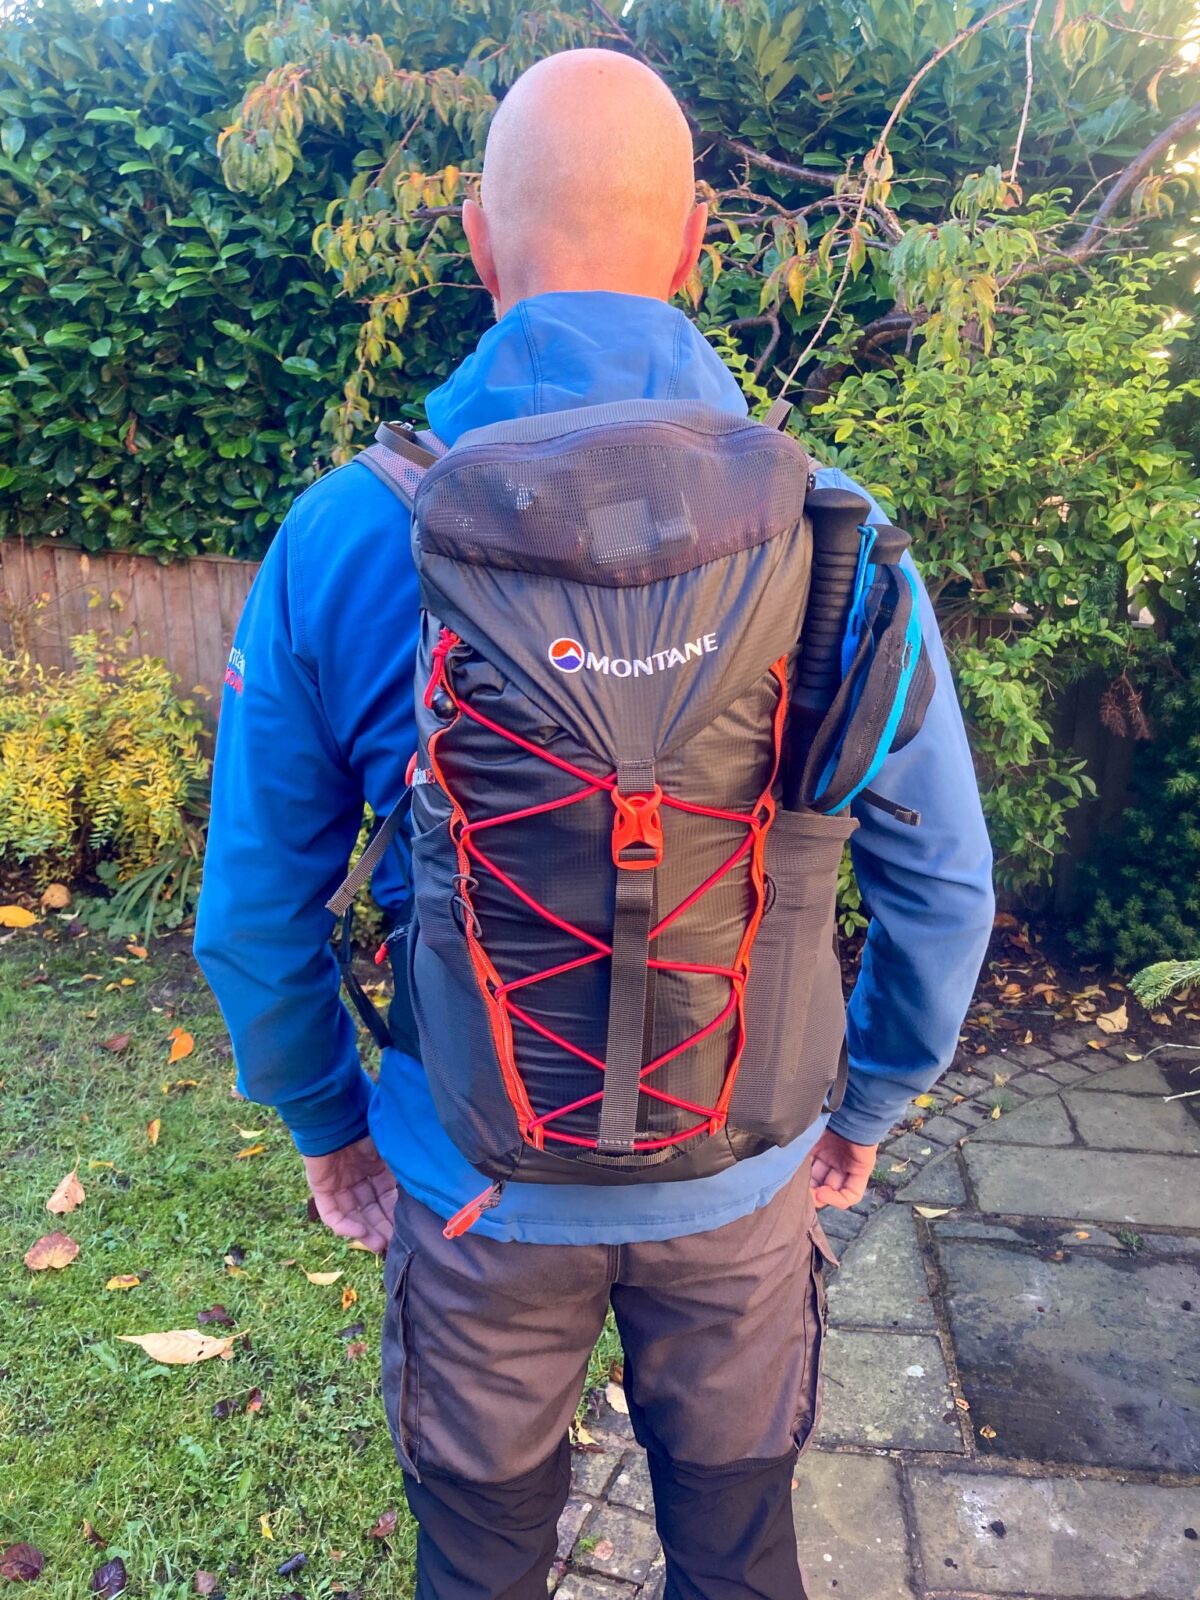
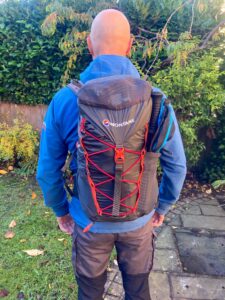
All of the above went into this 25 litre rucsac.
The day pack size you use is down to personal preference and might range between 20 and 35 litres depending on how much of the above kit is carried and where your route takes you. When I need the whole shebang and want to carry copious amounts of food and water with maybe a flask too, then I use a 33 litre Osprey Talon pack. But just to illustrate you can go smaller with the right choice of equipment, my photo below shows ALL the listed kit in just a 25 litre Montane Trailblazer rucsac which I use on a weekly basis for both walking and running in the hills and mountains.
Not shown is the whistle I always carry attached to the pack. If all else fails – six blasts on the whistle repeated at intervals may alert rescuers. Even if you know help is on its way it’s worth continuing to signal in order to guide personnel in to you. After dark, use your torch to give six flashes to achieve the same effect. These measures should be taken if no phone signal is available.
Hopefully this article will give aspirant mountain walkers a framework of the gear needed to keep themselves safe and self reliant. Some of the kit might never need to be used in anger but is there as an insurance policy. With decent planning, navigation and an awareness of situation, it’s unlikely that an issue will present itself that can’t be comfortably handled with the equipment outlined above…”
When the unexpected happens on a hillside, it can be difficult to focus on the right thing to do. First aid might need to be administered by any of us and just carrying a kit alone isn’t always going to help. A calm approach and knowledge of basic first aid skills will also be needed.
We’ve produced what we call a ‘casualty care’ sheet to be tucked inside your first aid kit and read through should the worst happen. It’ll prompt you down the DRABC route to the correct procedure for that crucial treatment should you be first on scene. It’s based on a more in depth version that Mountain Rescue teams carry and is also useful for recording relevant details and observations. We’d recommend you print it out on waterproof paper and carry a soft pencil to write on it.
Please click on the link below to take you to a printable PDF version of our casualty care sheet.
 Backpacking in the UK has probably never been so popular and given Mountainfeet used to sell tents when we were based in Oldham, our interest in the latest product is still high.
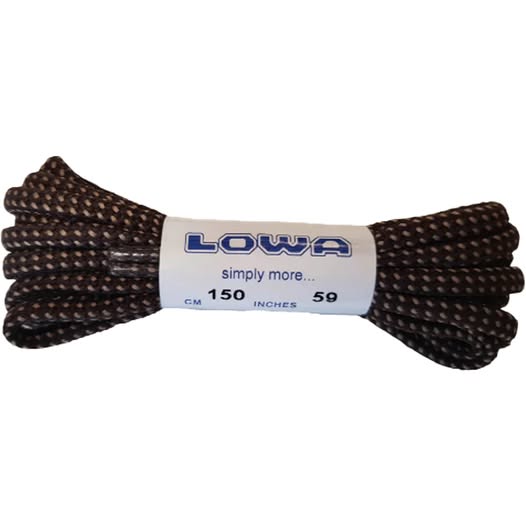

 There seem to be many of you out there who are embracing again the art of navigating using map and compass techniques. We find that one of the hardest skills to master is the visualisation of the terrain around us using just contour information from the map.
 Top tips, start simple – maybe just a single prominence first. Then work up to more complex terrain featuring cols, spurs and re-entrants. Set a time limit but use the first couple of minutes for just looking at and understanding the 2D map first. Don’t overthink things – just a basic representation will do. Make sure you have a means to check what the contours actually look like in real life – as already mentioned, OS Maps has a 3D feature.